Manage Workflows
The Manage Workflows page helps create tailored automated approval chains for trip requests based on certain rules. Each workflow combines specific trip categories, departments, vehicle types, and priority levels, ensuring requests route through the correct approval channels.
Navigate to Manage Workflows Page
-
Click Settings icon on the left.
-
Go to Manage Workflows.
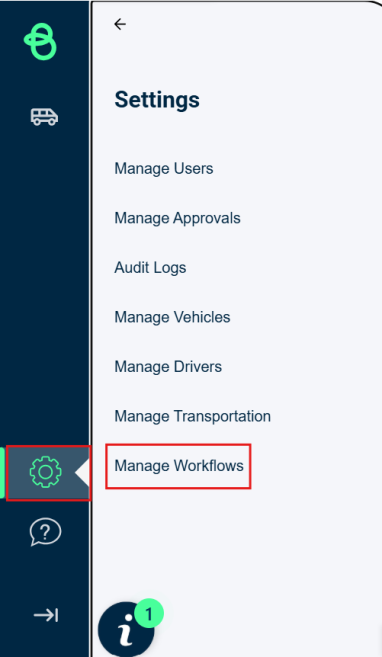
The Manage Workflows page appears.

Workflow Components
Priority
Priority defines where this workflow stands relative to other workflows. Lower numbers indicate higher priority as the workflows are evaluated in order of priority.
This feature ensures that when multiple workflows match the same trip request, only the workflow with the highest priority (lower number) executes. Users can manually set priorities when creating or editing workflows, and the system prevents duplicate priority assignments to avoid conflicts.
For example, if in Tip Category a Sports Event is selected for 1st priority and All option is selected for 2nd priority, then any new trip request related to Sports Event will be redirected to the 1st priority. Though the Sports Event is common in both the priority the 1st priority has lower number and thus system redirects the trip through it.

Trip Categories
The trip categories help choose trip types to target specific scenarios. You can add multiple categories.

Department
It defines the relevant departments to which the workflow applies. Multiple departments can be included in a workflow.

Vehicle Type
It specifies the vehicle type to be included in the workflow. Multiple vehicle types are supported.

NOTE If any of the trip categories, department or vehicle types are not required for approvals, then leave it blank.
Assign Approval Rule
It specifies the approval rule that is applied to requests that match this workflow. This approval rules are set in the Manage Approval tab prior to assigning any workflow.

NOTE If no approval rule exists, then go to the Manage approvals tab and create a approval rule. Steps to create an approval rule are here.
Adding a Workflow
-
To add a workflow, click Add Workflow button at the bottom.
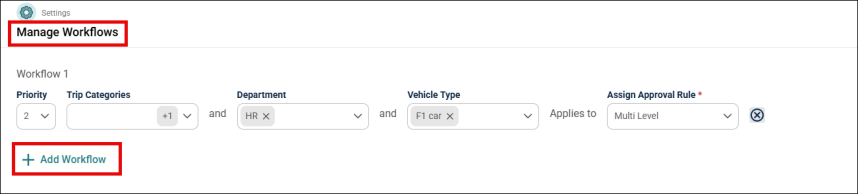
A row with all the fields for a new workflow will appear on the screen.

-
Enter a number to determine workflow order in Priority drop-down.
-
Choose one or more Trip Categories in Trip Categories drop-down.
-
Select the Departments using the drop-down.
-
Add the specific vehicles this workflow should cover in the Vehicle Type drop-down.
-
Choose the rule that governs the approvals for this workflow in the Assign Approval Rule drop-down.
-
Once all the fields are selected the workflow is saved automatically.
Delete a Workflow
-
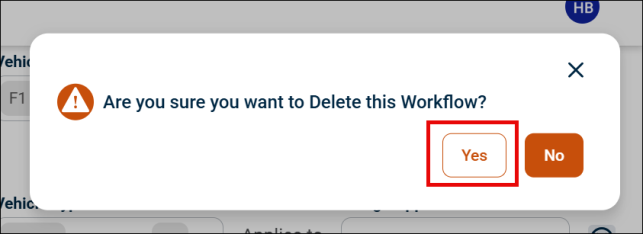
To remove a workflow, click the X icon on the right side of the workflow row.
-
A pop-up will appear on the screen, click Yes to delete the workflow.
Important Tips
-
Make sure to first create approval rules that fit your business needs in the Manage Approvals tab.
-
Always check the priority order—requests will be matched starting from the lowest priority number.
-
To edit a workflow or add more categories, departments, or vehicle types to existing workflow, just select the items from drop-down. The new settings will be applied to future trip requests.
